Introduction
IS IT A BIRD? IS IT A PLANE? NO, ITS A PROJECTILE!
This project is designed for groups to create a catapult that would be able to shoot a ball at a minimum range of 10 m. The catapult would be calibrated to be able to shoot at various heights and ranges. The type of catapult to be made is up to the group as to which they believe would be fit for this experiment. The types of catapults used would include the mangonel and the trebuchet.
The mangonel is a catapult with a long wooden arm attached by rope (twisted rope at the base of the catapult). The arm would be pulled back 90° where the arm would be locked in place so that the projectile can be safely loaded into the bucket attached to the arm.
Initial Thoughts
In our first meeting, we decided that our budget would be discussed after our final proposal was done based on what exactly we needed.
Plan of Action
Final Proposal
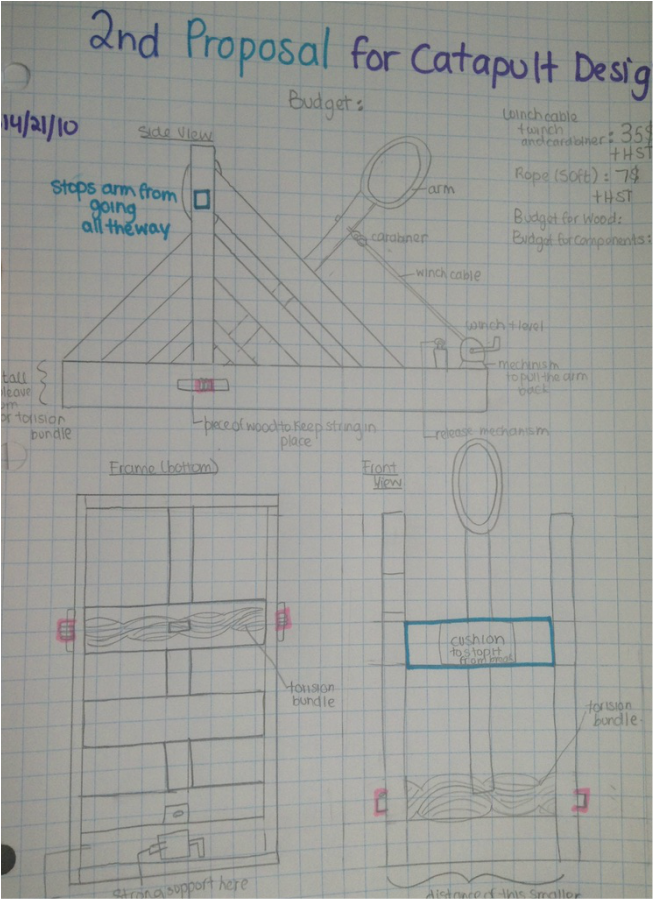
BUDGET FOR FINAL PROPOSAL
Our budget for this project was around $120 in which we all pitched in $40. Parts of our project like the winch was priced at $40 and the rope at $20. That left $60 for the rest. We intended on using wheels that cost a sum of $20 and $40 for the wood and bolts.
Our budget for this project was around $120 in which we all pitched in $40. Parts of our project like the winch was priced at $40 and the rope at $20. That left $60 for the rest. We intended on using wheels that cost a sum of $20 and $40 for the wood and bolts.
Building Procedure
|
|
1.
Produce a blueprint of
desired catapult, make sure research has been done before hand
2. Gather all required materials based on blueprint and budget planned 3. Start by measuring the wood panel for the base of the structure; the length being 5 meters and the width being 3 meters 4. Cut using a hand saw or electrical saw, make sure safety precautions are taken 5. Bolt all the pieces together, make sure the bolts are bolted on the side containing the longer wood panel 6. Add four wheels to each corner of the base 7. Then work up from the base to the two main side panels, measuring at 4 meters, repeat step 4 8. Place two bolts on each side (will be enduring the most force, make sure the bolts are big) 9. Perpendicular to the side panels, place a panel that is 3 meters (this will stop the arm from swinging the whole length), screw it in with 2 screws for each side 10. With thinner panels, attach pieces to the side panels, make sure to screw them in 11. Cut 2, 3 meter pieces for the base. This will prevent the base from cracking inwards because of the pressure from the torsion bundle 12. Cut a 5 meter piece of wood, this will be for the arm. This panel should be the thickest piece (not a rectangular shape as used before). 13. Drill 2 holes at either ends of the base for the rope to go through, also drill a hole through the arm (make sure the hole is not too high up, the arm cannot touch the ground and align it with the holes drilled on the base) 14. Start the torsion bundle, make sure the two rodes needed to crank the tension up or down are very durable and will not bend with the amount of tension acting on them 15. To help with making the torsion watch this video https://www.youtube.com/watch?v=PRSBKm1encM 16. Add 0.5 meter piece of wood parallel to where the arm is placed, add garden lock 17. On the arm, drill a hole and screw in a hook where it can go in the garden lock 18. Add a little piece of wood which is about 9 cm in length and width, nail it to the top of the arm. Cut the side that is not nailed, about 45 degrees 19. Attach a scoop like shape to the end, rope it down 20. Paint desired colours 21. Use tennis ball to test shots, make modifications based on the range catapult shoots |


Launch Day!
|
|
On the day that we launched our catapult. We encountered many errors. One of the issues was the cradle. We crafted a simple wooden box to hold the ball and then launch it when released. The dimensions of this box made it hard for the ball to leave the arm, and even when the ball left, it wouldn't go very far.
Another problem we faced was that we noticed parts of our catapult seemed to be restricting its full range. The arm was too heavy to be able to shoot properly. |
We failed at successfully completeing the given tasks, to say the least. We were not able to achieve a max range of 10m and were unsuccessful in hitting any of the target.
MODIFICATIONS
|
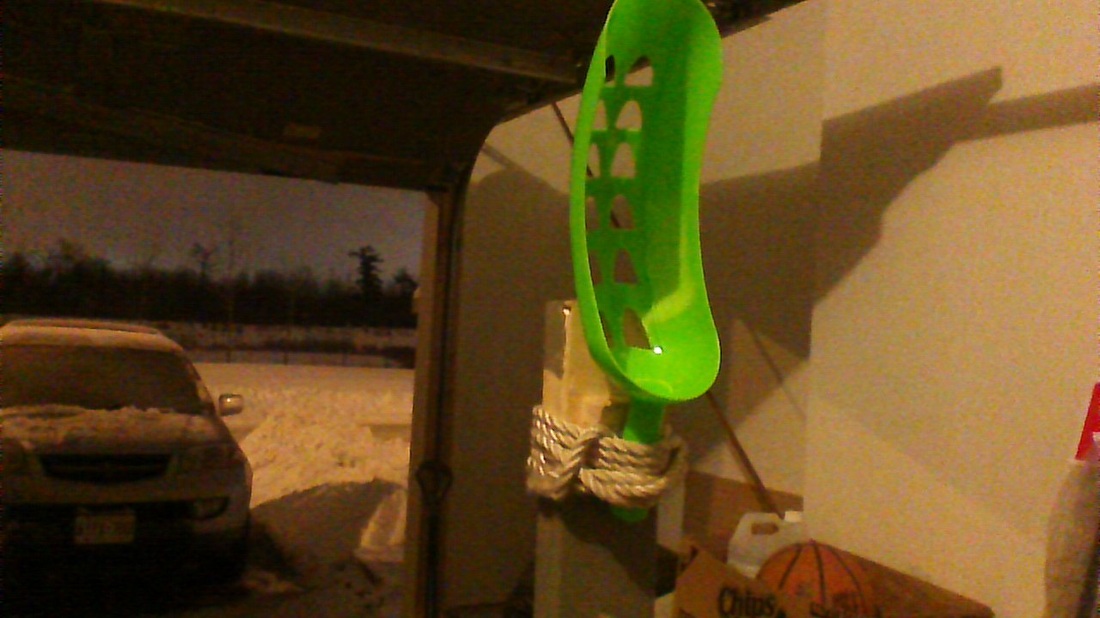
Given the amount of success we had on launch day, we decided to make a few modifications to our initial design. We couldn't change the rope used, but we changed the cradle, we decided to use something that would let us launch at and angle and also have minimal friction between the tennis ball and the material. Many different things were experimented with and we ended with a reasonable option.
|
|
|
|
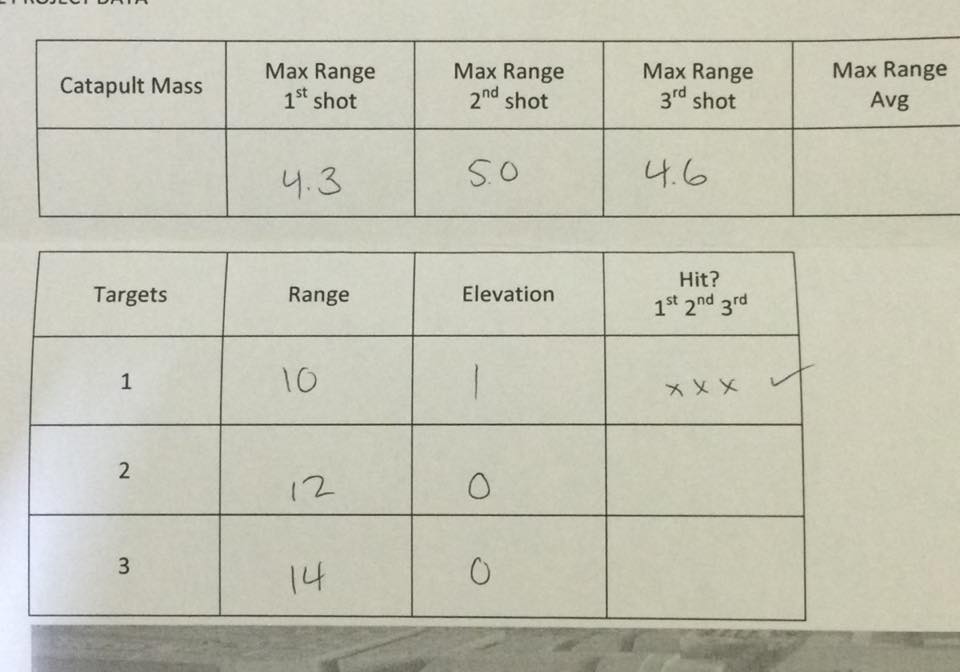
Once a few modifications were made, we lucky got out catapult to shoot to a max range of around 12 m. After recording a video and analyzing it in video tracker, we measure this trials range to be 12 m (which is shown in the distance time graph below).
|

Calculations
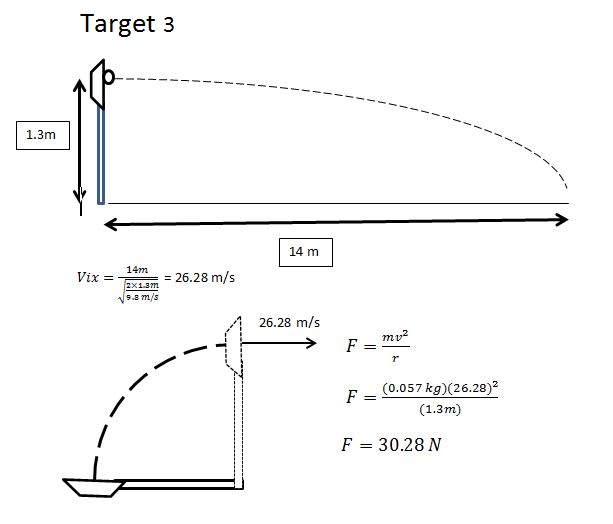
We were able to analyse a portion of what happened during our catapult launch. We could figure out the initial velocity at which the ball was launched.
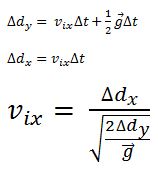
During the day of the launch out velocity was , because the minimum displacement is 10 m , the minimum velocity has to be 18.77 m/s.
After some modifications our initial velocity was
After some modifications our initial velocity was
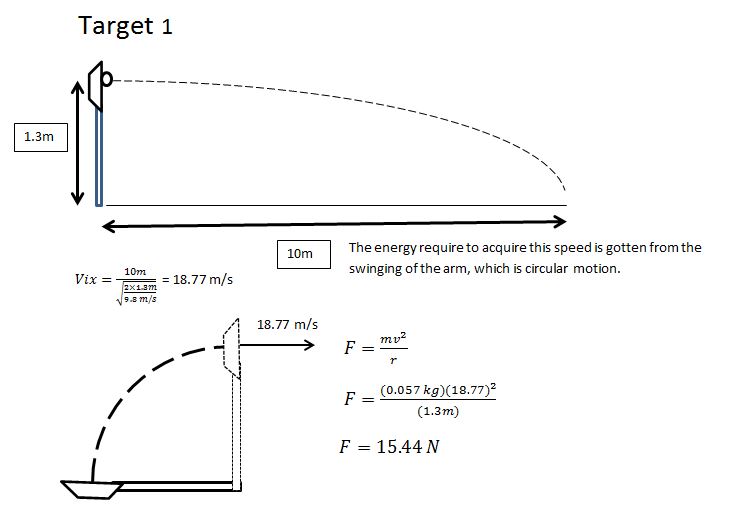
Analysis for Target 1:
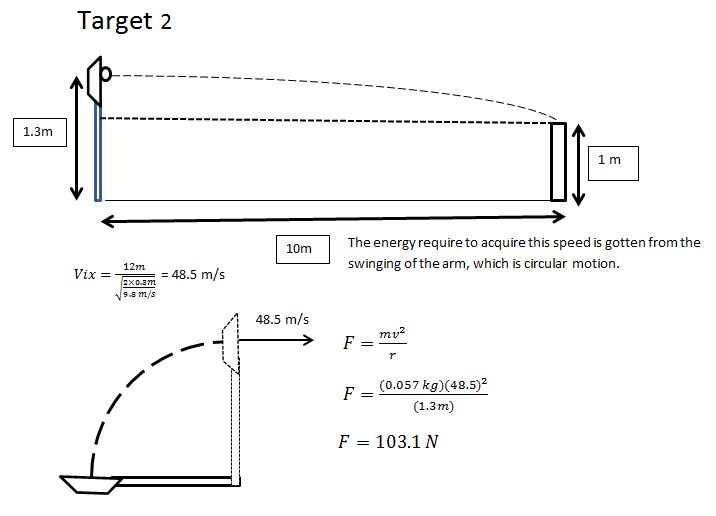
Analysis for Target 2:
Sources of Error
This purpose of this experiment was to build a catapult that could reach a minimum distance of 10 m. What held the catapult from reaching a greater distance was the result of various different sources of error within the lab. Some errors in the lab included:
- The "bucket" in which the ball was placed. A projectile should be aimed at an initial angle of 45° in order to attain maximum range, therefore, if the perfect angle was not achieved, the ball wouldn't have shot far enough. This can be proven using the range equation where . Any angle above or below 45° would decrease the maximum range of the projectile.
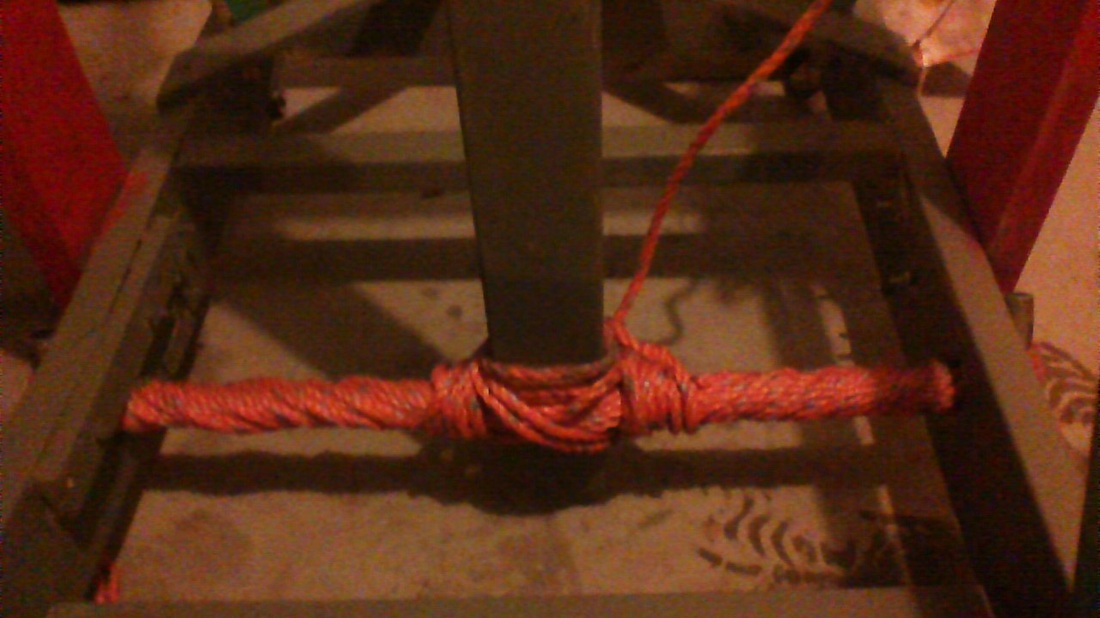
- also, the material in which the catapult was created also incorporated in the amount of force used to shoot the projectile into the air. Specifically for the mangonel, the rope used for the torsion bundle should be made of nylon or natural material to provide great strength and elasticity.
-lastly, we should have taken a video of the arm swinging in circular motion and then used video tracker to come up with a final speed, which we could have used to calibrate the catapult
- The "bucket" in which the ball was placed. A projectile should be aimed at an initial angle of 45° in order to attain maximum range, therefore, if the perfect angle was not achieved, the ball wouldn't have shot far enough. This can be proven using the range equation where . Any angle above or below 45° would decrease the maximum range of the projectile.
- also, the material in which the catapult was created also incorporated in the amount of force used to shoot the projectile into the air. Specifically for the mangonel, the rope used for the torsion bundle should be made of nylon or natural material to provide great strength and elasticity.
-lastly, we should have taken a video of the arm swinging in circular motion and then used video tracker to come up with a final speed, which we could have used to calibrate the catapult
Contributions
This project was created with much effort from all group members. Here is a list of the certain components completed by each member:
Aranksha-
- Created the design
- Contributed to the cost
- Helped construct the catapult
- Completed the calculations related to the follow-up of the lab
- Acted in the video
- Helped create the website
- Created the plan of action
Gurleanjit-
- Provided the theme of the video
- Acted in the video
- Contributed to the final cost
- Helped construct catapult
- Provided the procedure of the lab
- Helped create the website
- Edited video
Gagan-
- Helped construct the catapult
- Filmed the video
- Contributed to the cost
- Edited the video
- Provided sources of error in the lab
- Helped create website
- Provided transportation of the catapult
